Spring Boot 使用 Redis 缓存
首先引入依赖
<dependency>
    <groupId>org.springframework.boot</groupId>
    <artifactId>spring-boot-starter-data-redis</artifactId>
</dependency>
配置 Redis 并开启缓存
@Configuration
@EnableCaching
@AutoConfigureAfter(RedisAutoConfiguration.class)
public class RedisCacheConfig extends CachingConfigurerSupport {

    @Resource
    private Jackson2ObjectMapperBuilder builder;

    @Bean
    public RedisTemplate<String, Serializable> redisTemplate(LettuceConnectionFactory factory) {
        RedisTemplate<String, Serializable> template = new RedisTemplate<>();
        template.setConnectionFactory(factory);
        template.setKeySerializer(new StringRedisSerializer());
        template.setValueSerializer(new Jackson2JsonRedisSerializer<>(Serializable.class));
        template.afterPropertiesSet();

        return template;
    }
}
此时即可使用相关缓存注解
@Cacheable
@CachePut
@CacheEvict
@ApiOperation("根据 ID 获取")
@GetMapping("/{id}")
@Cacheable(value = "company", key = "#id")
public CompanyVO getById(@PathVariable Long id) {
    return companyConverter.companyToCompanyVO(companyService.getById(id));
}

@ApiOperation("根据 ID 修改")
@PutMapping("/{id}")
@CacheEvict(value = "company", key = "#id", beforeInvocation = true)
public void updateById(@PathVariable Long id, @RequestBody CompanyDTO companyDTO) {
    Company company = companyConverter.companyDTOToCompany(companyDTO);
    company.setId(id);
    companyService.updateById(company);
}

@ApiOperation("根据 ID 删除")
@DeleteMapping("/{id}")
@CacheEvict(value = "company", key = "#id", beforeInvocation = true)
public void deleteById(@PathVariable Long id) {
    companyService.removeById(id);
}
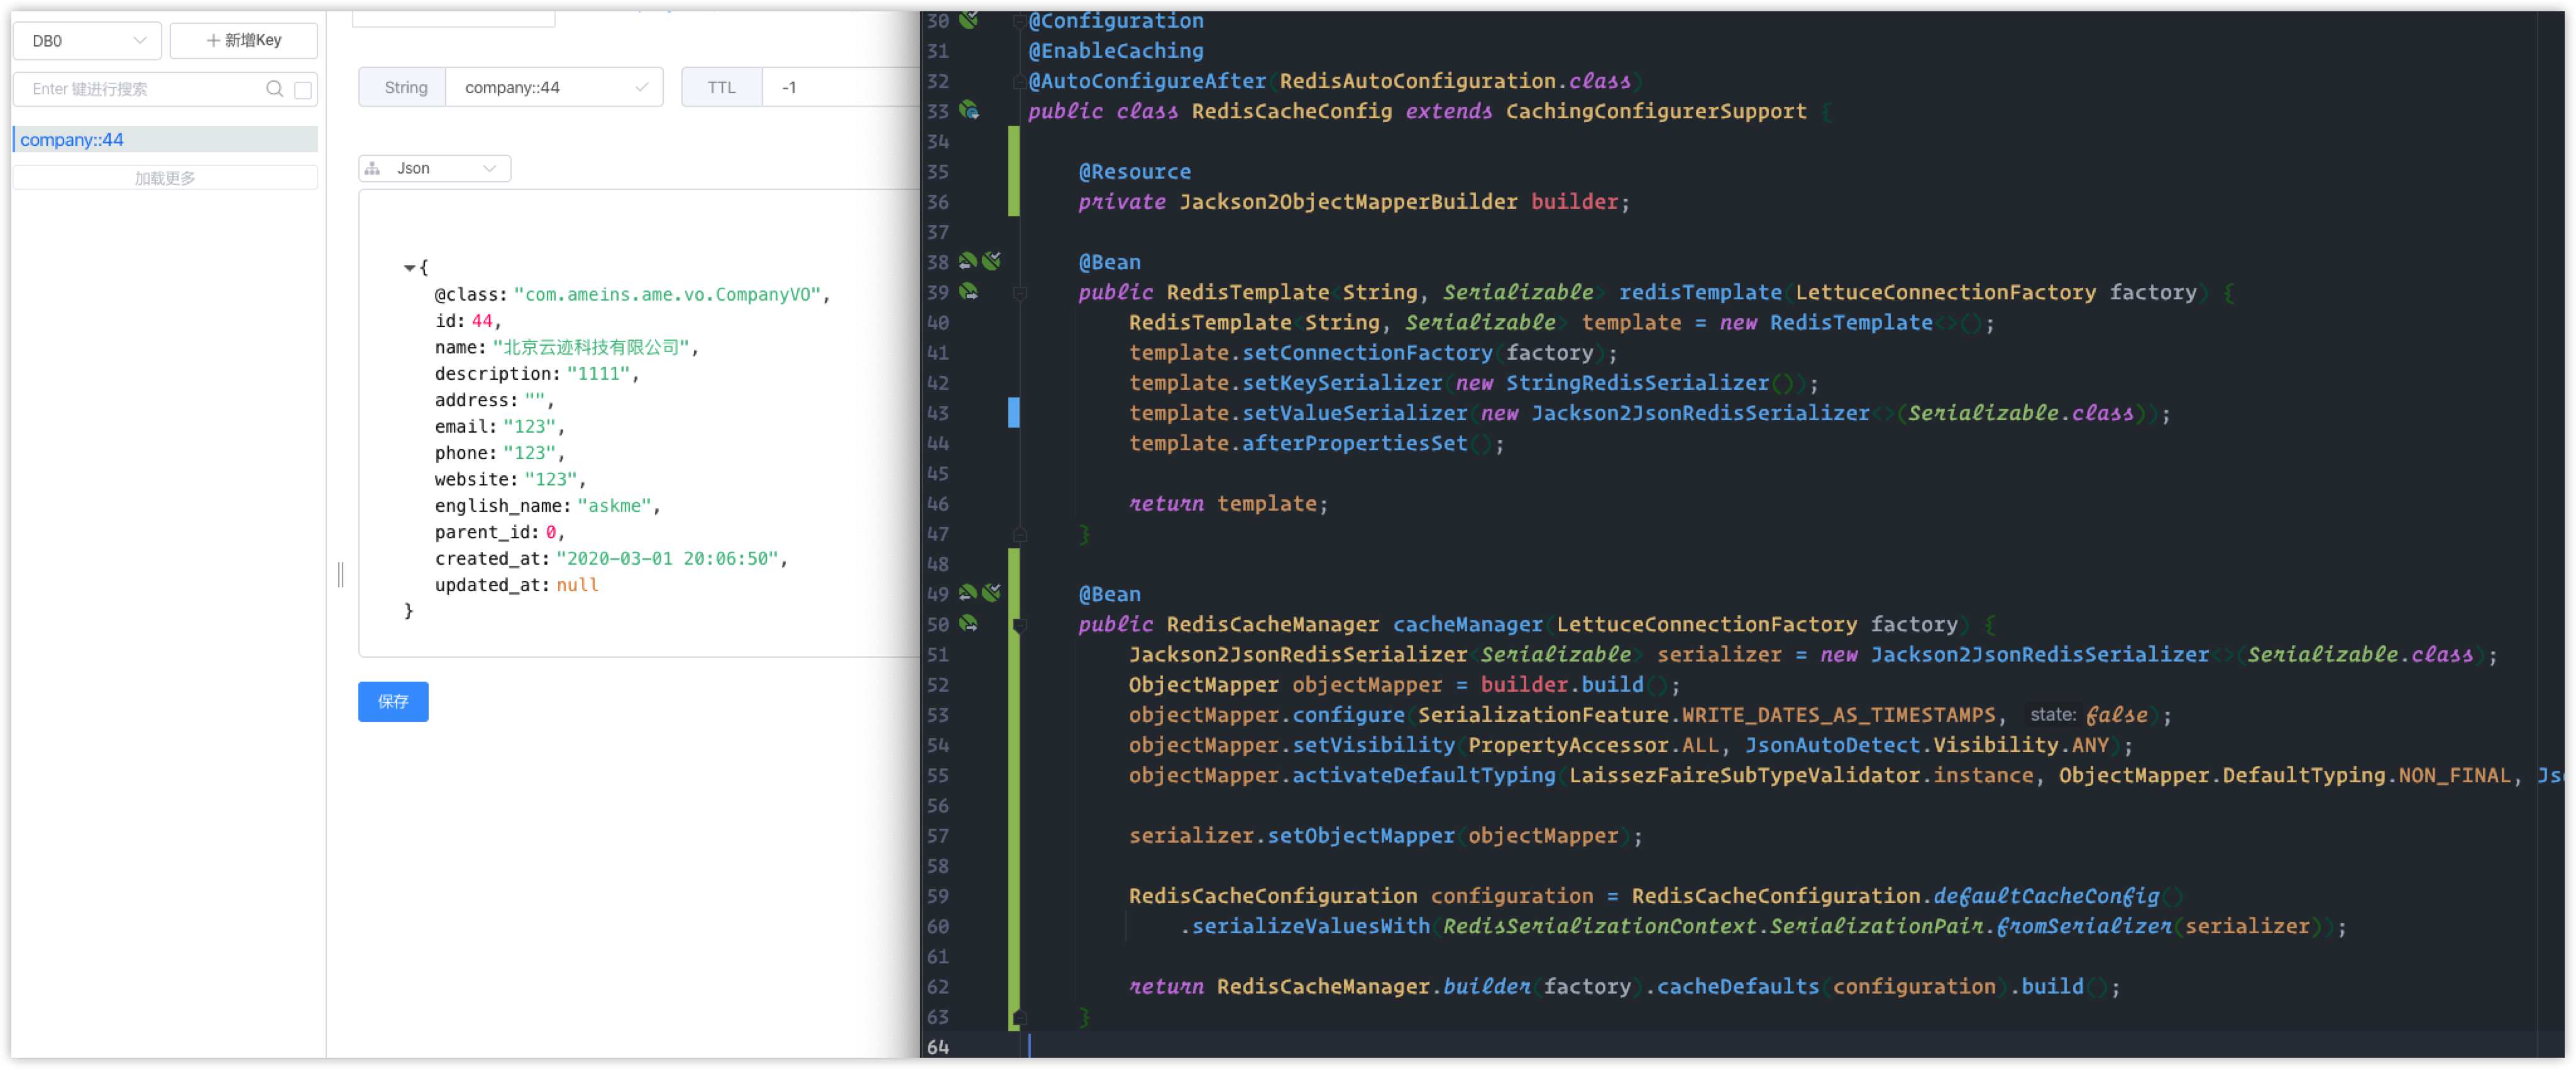
Redis 中生成的缓存为 company::#id 比如 company::44,如需更改键生成策略则需要自定义 KeyGenerator 复写其生成逻辑。
但此时我们看到 Redis 中存储的为二进制格式,如遇到问题不方便排查,我们可以自定义 CacheManager 来修改值为 Json 存储
配置 Redis 中值存储为 Json
RedisConfig 类中新增如下逻辑
@Configuration
@EnableCaching
@AutoConfigureAfter(RedisAutoConfiguration.class)
public class RedisCacheConfig extends CachingConfigurerSupport {

    @Resource
    private Jackson2ObjectMapperBuilder builder;

    @Bean
    public RedisTemplate<String, Serializable> redisTemplate(LettuceConnectionFactory factory) {
        RedisTemplate<String, Serializable> template = new RedisTemplate<>();
        template.setConnectionFactory(factory);
        template.setKeySerializer(new StringRedisSerializer());
        template.setValueSerializer(new Jackson2JsonRedisSerializer<>(Serializable.class));
        template.afterPropertiesSet();

        return template;
    }

    @Bean
    public RedisCacheManager cacheManager(LettuceConnectionFactory factory) {
        Jackson2JsonRedisSerializer<Serializable> serializer = new Jackson2JsonRedisSerializer<>(Serializable.class);
        ObjectMapper objectMapper = builder.build();
        objectMapper.configure(SerializationFeature.WRITE_DATES_AS_TIMESTAMPS, false);
        objectMapper.setVisibility(PropertyAccessor.ALL, JsonAutoDetect.Visibility.ANY);
        objectMapper.activateDefaultTyping(LaissezFaireSubTypeValidator.instance, ObjectMapper.DefaultTyping.NON_FINAL,
                JsonTypeInfo.As.PROPERTY);

        serializer.setObjectMapper(objectMapper);

        RedisCacheConfiguration configuration = RedisCacheConfiguration.defaultCacheConfig()
                .serializeValuesWith(RedisSerializationContext.SerializationPair.fromSerializer(serializer));

        return RedisCacheManager.builder(factory).cacheDefaults(configuration).build();
    }
}
同时需要再引入 Jackson 依赖使其能进行时间日期的序列化
<dependency>
    <groupId>com.fasterxml.jackson.datatype</groupId>
    <artifactId>jackson-datatype-jsr310</artifactId>
</dependency>
配置文件中加入
spring:
  jackson:
    serialization:
      write-dates-as-timestamps: false
此时再看 Redis 中生成的缓存值
大功告成!